
Add and manage stores
Connect another Shopify store to your workspace, switch between your stores, read how each one is connected, and disconnect one you no longer need.

Each store keeps its own products, Library, campaigns and analytics. The store switcher, at the foot of the sidebar, chooses the one you are looking at. Stores, in the settings, connects more of them and shows how each one is connected.
Before you start
- You are an owner or an admin of the workspace.
- Your first store is included in your plan. Each further store adds $19 a month to your bill, or $190 a year on a yearly plan.
- What your first store needed: a Shopify login that can create apps in the store’s admin, and about ten minutes. See Connect your store.
Add a store
Open Stores
Press the store switcher at the foot of the sidebar, then Manage stores. Or press the gear in the top bar, then the Stores tab.
Press Connect store
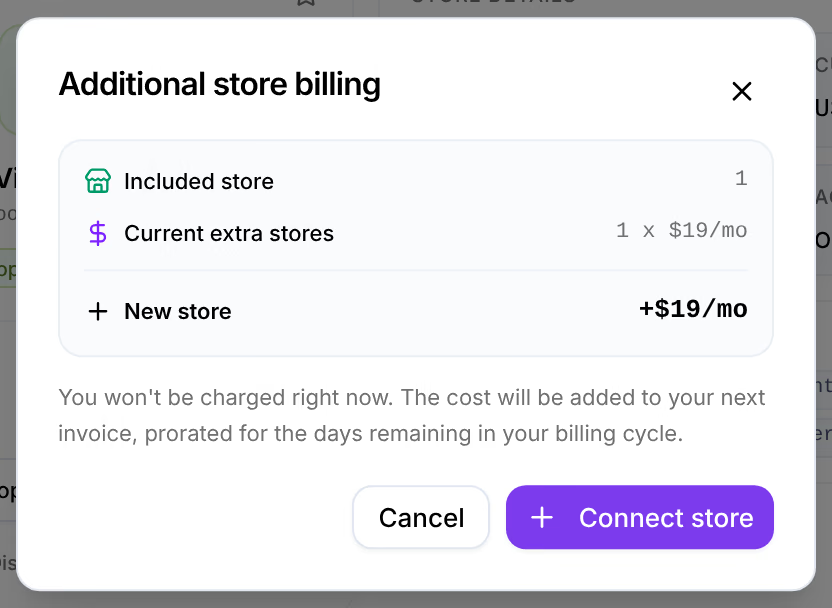
Connect store is at the top of the tab. Additional store billing shows what the new store adds to your bill: nothing is charged now, and the next invoice carries it, prorated. Press Connect store in that window to go on.
Type the store’s name
Connect Shopify store opens. Type the store’s name, as in its
.myshopify.comaddress, and press Connect store. The window becomes the guide to the store’s own app.Create the store’s app and paste its keys
Every store has its own app, in its own Shopify admin. Create it and paste its three keys as for your first store: see Create the app in Shopify and Paste the keys. If the window reads Install the app on your store after you installed it, press Check again.
Set its pixel to Always on
Once the store connects, the window ends on its card and Pixel data access, as in setup: Shopify gives a new app pixel Optimized, under which it may pause it. Press Open Customer events, click Omnymous, select Always on and click Save. Back in Omnymous, the card reads Always on by itself and Done becomes available. See Set the pixel to Always on.
Check that it worked
Press Done. The store is listed under All stores, which now counts how many stores are included and how many are extra, and the store switcher offers it.

Omnymous starts reading the store’s products and orders from Shopify at once; its analytics fill in as its history arrives.
Switch between stores
The store switcher shows your workspace and its stores. Pick one, and every screen shows that store until you pick another. On Stores, the store you are looking at is marked Current under All stores, and every other one has Switch.
What the Stores tab shows
The card at the top is the store you are looking at:
| Name | What it does |
|---|---|
| Status | Active while the store syncs. expired or retrying when its Shopify access stopped: see The store stopped syncing. |
| Connected | When the store was connected to Omnymous. |
| Last sync | When Omnymous last read the store from Shopify. Products and orders arrive as Shopify sends them. |
| Shopify admin | Opens the store’s admin in a new tab. |
Store details lists its currency, its time zone, when it was installed, the permissions its app granted, and its Pixel data access: what Shopify lets the pixel receive. Always on is what it needs. Optimized, Limited or Paused means Shopify can pause it or already has, and comes with Open Customer events, the page in your Shopify admin that changes it. Under All stores, another store whose pixel needs this reads, for example, · Pixel paused. Below it, three settings belong to the store: Brand colors, the colors your generated pages are made in; Pixel consent, see Consent; and Live pages, which brings your published pages up to the latest page renderer.
Disconnect a store
Disconnect store asks you to type the store’s name. It removes the store from Omnymous with its synced products, the ad accounts and campaigns linked to it, the content generated for it, and its pixel and analytics data. It cannot be undone.
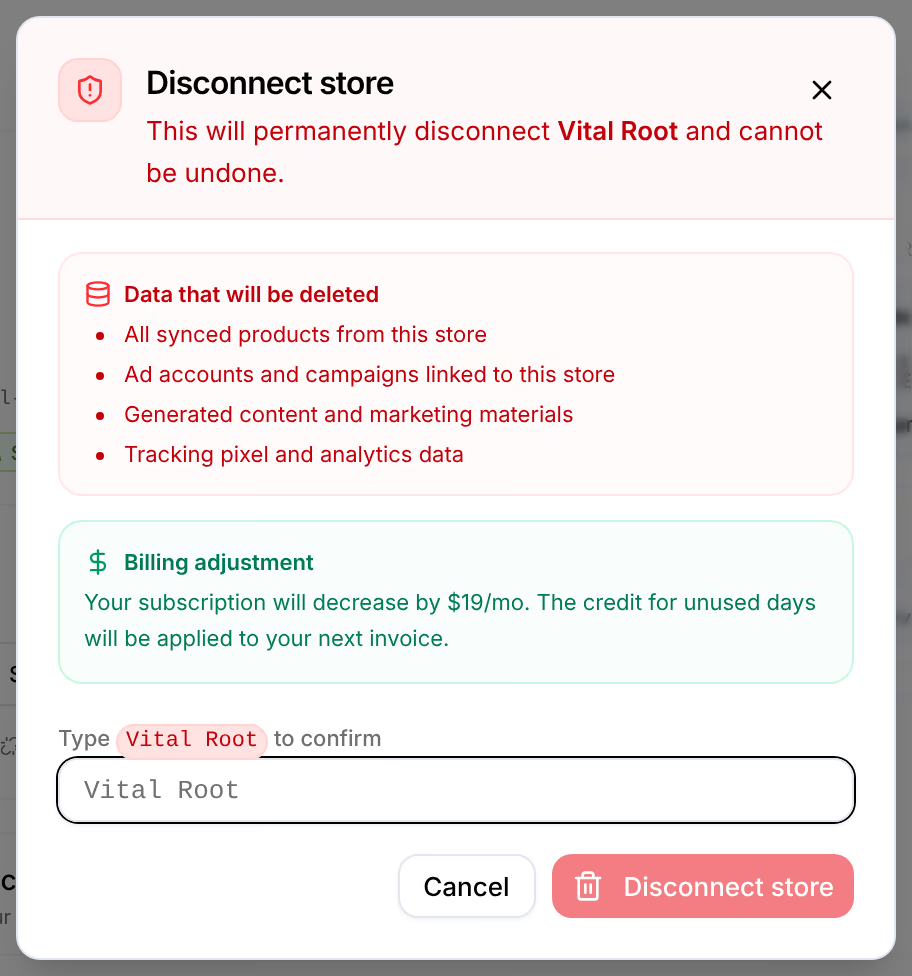
An extra store’s price comes off your bill, and the unused days are credited on the next invoice. A workspace keeps at least one store: its last store cannot be disconnected.
To stop Omnymous reading a store without deleting anything, uninstall the Omnymous app in the store’s Shopify admin instead. The store then reads Reconnect needed until you connect it again.
If something goes wrong
| What you see | What to do |
|---|---|
| Reconnect needed on a store | Its Shopify access stopped. See The store stopped syncing. |
| Pixel data access reads Optimized, Limited or Paused | Press Open Customer events, click Omnymous, select Always on and click Save. Another store’s row reading · Pixel paused is fixed from its own card: switch to it first. |
| “This store is already connected to another Omnymous workspace” | A store belongs to one workspace. Disconnect it there first. |
| Disconnect store is greyed out | It is the workspace’s only store. |
| Anything while creating the app or pasting its keys | See Connect your store. |
Related
- Connect your storeCreate an app for Omnymous in your own Shopify admin, paste its keys into setup, then set its pixel to Always on so Shopify never pauses it.
- BillingThe plan and what it costs, the billing cycle, the card Stripe charges, extra stores, cancelling, and what happens when a payment fails.